Broken Microsoft Dynamics 365 Business Central Single-Sign-On with Multi-Tenancy setup

Dynanmics 365 Business Central logo

After having a Single-Sign-On (towards Azure Active Directory)/Multi-Tenancy setup running on Dynamics NAV 2018 for some time, I tried to create the same setup with Microsoft Dynamics 365 Business Central 2018 fall release.

And to my surprise it failed with this error just after logging in: “The value for the WSFederationLoginEndpoint configuration settings cannot be empty.”. My “WSFederationLoginEndpoint” setting was NOT empty, so the error does not make any sense.

The value for the WSFederationLoginEndpoint configuration settings cannot be empty.

It puzzled me for a while because these setups was working without any problems:

  • Dynamics NAV 2018, Single Tenant
  • Dynamics NAV 2018, Multi Tenant
  • Dynamics 365 Business Central 2018 fall release, Single Tenant

So the Single Tenant BC was working, but failed as soon as I configured it for Multi Tenancy.

Finally after weeks of messing around I gave up and reached out to my contacts from Microsoft Development Center Copenhagen to see if they could help me solve the issue (first I off cause raised a ticket with Microsoft Support). Luckily Freddy from https://freddysblog.com/ knew exactly what was wrong with my setup – and was able to send me the exact solution. And made the effort to do this on a Saturday morning! πŸ™‚

THANK YOU FREDDY πŸ™‚ !!! – please click here to visit his blog!

Oh – I almost forgot. If you have this error, empty these configurations settings from the Service Tier:

  • AzureActiveDirectoryClientId
  • AzureActiveDirectoryClientSecret

These two settings are used in Dynamics NAV 2018, but should be left empty in Microsoft Dynamics 365 Business Central.

Broken AL in Visual Studio Code October 2018 release (1.29)

Visual Studio Code logo

October 2018 release (1.29) for Visual Studio Code was just released, but unfortunately it breaks the possibility to publish AL extensions to your Dynamcs NAV / 365 Business Central.

Don’t blame the guys behind Visual Studio Code, this one is probably on the AL extension guys.

Only solution i know is to downgrade Visual Studio Code to the September 2018 (1.28.2) release or earlier for now, but I’m sure it will be fixed in the next CUs for NAV/BC.

The symptoms of this error is:

  • When publishing you don’t get any output in the VSC DEBUG CONSOLE. Only the OUTPUT shows the “normal” behaviour.
  • The Web Client won’t start after the publish.
  • The extension is not published if you start Web or Windows Client manually and check.
  • Your Windows Event Viewer will have several errors from your NAV Service tier with lots of call stack for each attempt to publish. The important text to search for is errors like:
    • Message (InvalidOperationException): RootException: InvalidOperationException
      This operation cannot be performed after the response has been submitted.
    • Message Failed request — Method:GET; Url:http://localhost:7349/NAV130_GSL/dev/metadata; StatusCode:InternalServerError; ReasonPhrase:Internal Server Error; Token:
    • Message (InvalidOperationException): RootException: InvalidOperationException
      Dynamic operations can only be performed in homogenous AppDomain.

The missing AL language support for VSC October 2018 release (1.29) was mentioned very briefly at NavTechDays 2018 in one of the first sessions (forgot which one), but I’ve not been able to find it on Google, so that is why i provide this blog post.

These kind of errors is almost impossible to trouble shoot if you cannot Google them :-).

Hint: Visual Studio Code will auto-update to the newest release automatically. To disable this, go to File/Preferences/Settings and change the “update.channel” to “none”. I highly recommend that you return this setting to its original value when the AL-language guys fix this error.

Cent and Yen in Dynamics NAV 2018

Microsoft Dynamics NAV logo

If you run a Danish Dynamics NAV and get objects from outside Denmark, you might experience the Danish letter ΓΈ/Ø beeing replaced by Β’/Β₯ (the sign for Cent and Yen).

The fix?
Simply export all your objects as text, run them through the following powershell and import them again.

(((Get-Content -encoding Oem "InFile.txt") -replace ([char]8250),([char]251)) -replace ([char]157),([char]238)) | Set-Content -encoding Oem "OutFile.txt"


Finish off by a compile and syncronize all tables.

This is off cause on your own risk, so start by taking a full backup of your NAV system/server.


2018-12-20 Updated: powershell improved and now using unicode values of chars

My Dynamics NAV App is FUBAR (updated 2018-06-22 with new solution)

Microsoft Dynamics NAV logo

For readers not knowing what FUBAR is, please see Wikipedia.

If you Dynamics NAV 2018 service will not start (or actually shuts down immediately when you try to start it), and you get something like this in your Windows Event Viewer (App Name, object ID and/or Name can probably be different ones):

Message: <ii>An error occurred while applying changes from the 'Payment and Reconciliation Formats (DK) by Microsoft 1.0.20348.0' app to the application object of type 'PageExtension' with the ID '13623'. The error was: InvalidOperationException - Metadata delta application failed due to the following error(s): The metadata object IncomingDocAttachFile was not found.</ii>

…your installation is FUBAR (or at least I don’t know how to repair it easily).

PowerShell cannot uninstall/unpublish the App when no Service Tier is running – so that is not an option.

Also I was not able to Google a solution, but here is what I did to make the service tier run again:

  • Take a fresh backup, and make sure nobody will open NAV until you say OK (it will be possible as soon as we get the Service Tier running again).
  • Export all your objects to text and locate (search for) the (probably page) object with the metadata object that could not be found (i.e. “IncomingDocAttachFile” in my example). I found it in Page Object 25.
  • Export the (Page) Object to a FOB-file (just so you have it).
    Overwrite/reimport the (Page) Object from a backup without your latest changes (be warned – if this is a table object, this will empty the table – so make sure to preserve the data somehow).
  • Redo your changes to the object without messing with theΒ metadata object that could not be found (i.e. “IncomingDocAttachFile” in my example.

Test that everything is ok, before letting anyone work again.

NOTE: I’ve not tried this with a table object, only a page object – so I’m not even sure this error can occur on tables?

DISCLAIMER: This is probably unsupported by Microsoft and you should do this on your own risk. We will not be responsible for any problems, data loss or down time etc. you may discover/experience following this procedure, or after doing this procedure. You are on your own here – but hopefully this will help you and save you the effort of finding a solution yourself! πŸ™‚


2018-06-22 I did’nt quite nail the solution first time around, as the problem creped in again. So I change the solution to the right one πŸ™‚

Commodore 64 s/n U.K.B1717794 Repair Log (Work In Progress)

Commodore logo

Do you have a defective / non working Commodore 64 breadbin?
I probably want it!
Make me an offer on gert@dabbler.dk and state if you want to sell it or swap it for this working one (you will have to pay my costs in parts and shipping – but not my time) πŸ™‚


Purchased 22th August 2017 on eBay:

  • Breadbin: SER.NO.U.K.B1717794
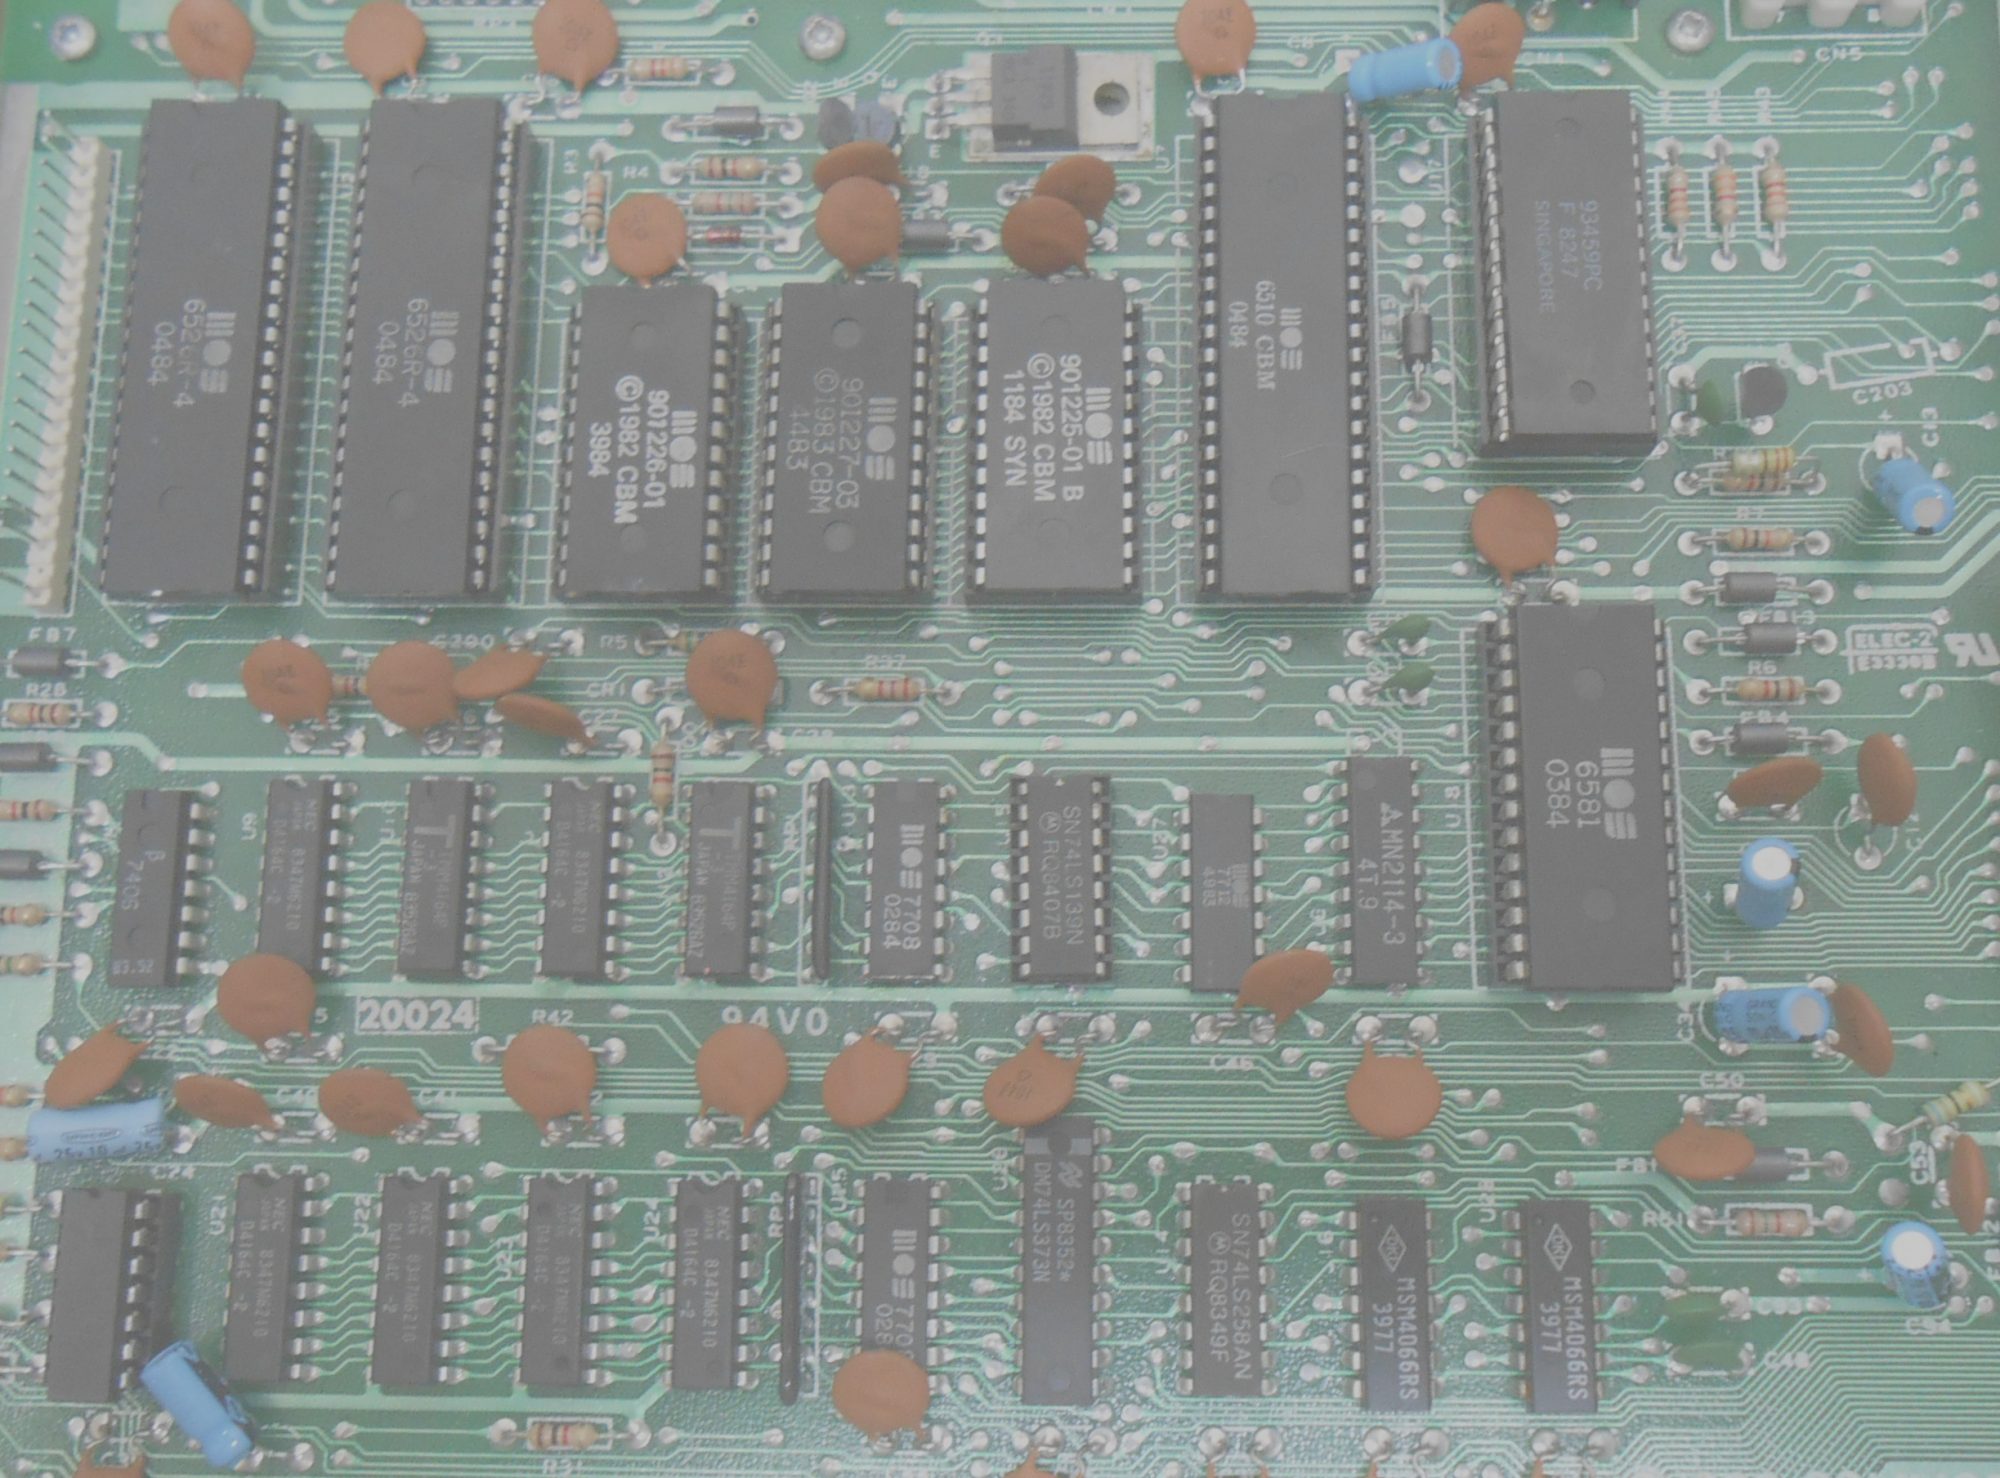
  • Motherboard: S/N 938896, assy No. 250407, artwork no. 251137, rev. B. Made in Hong Kong


Chips:

  • U1: CIA, MOS 6526, week 25, 1984
  • U2: CIA, MOS 6526, week 19, 1984
  • U3: BASIC ROM, MOS 901226-01, week 25, 1984
  • U4: Kernal ROM, MOS 901227-03, week 24, 1984
  • U5: Character ROM, MOS 901225-01 (no week and year)
  • U6: Color RAM, MM2114N (no week and year)
  • U7: CPU, MOS 6510, week 29, 1984
  • U17: PLA, MOS 906114-01, week 22, 1984
  • U18: SID, MOS 6581, week 25, 1984
  • U19, VIC2, MOS 6569R2, week 25, 1984
  • RAM, 8*Mitsubishi Electric M5K4164ANP


Sellers description:

Commodore 64 keyboard.
No other items with this.
I have confirmed the power light lights up when plugging my power pack in.
2 loose buttons, included. Can be glued back on.


Repair log:

  • 4 loose buttons (F1, +, C= and Run/Stop). Replaced plundgers
  • Plastic screw holes for motherboard damaged. Repaired/recreated/strengthened with hot glue
  • Cabinet screw holes damaged. Repaired/recreated with hot glue
  • F7/F8 not working – broken trace on keyboard PCB repaired
  • U25 (MOS7708, week 23, 1984) defective. Black screen but with video sync. Replaced with HD74LS257P. Board hard do desolder on because of corrosion, so damaged 3 tracks. Those repaired with wires.


Work in progress:

  • 1 wobling button (V). Glue half broken plundger if possible – otherwise replace
  • Cleaning
  • re-capping motherboard/RF-module
  • Heatsinking larger MOS chips
  • Overvoltage protection on motherboard (P6KE6.8CA)
  • Build a PSU


Costs (total DKK 800):

  • Breadbin: DKK 400,-
  • Plundgers: DKK 75,-
  • PSU (transformator, wire, connector): DKK 225,-
  • Misc.: DKK 100,-

Let me know if you will buy it for my costs when it is done πŸ™‚

Commodore 64 s/n U.K.B1309074 Repair Log (Work In Progress)

Commodore logo

Do you have a defective / non working Commodore 64 breadbin?
I probably want it!
Make me an offer on gert@dabbler.dk and state if you want to sell it or swap it for this working one (you will have to pay my costs in parts and shipping – but not my time) πŸ™‚


Purchased 18th August 2017 on eBay:

  • Breadbin: SER.NO.U.K.B1309074
  • PSU: Part No. 310200-04
  • Datasette: C2N, Serial No 2871008, Made in Taiwan
  • Joystick: Spectravideo, model 318-102
  • Original Commodore 64 MicroComputer User Manual, 1984, Printed in England
  • The Commodore 64 Games Book – 21 Sensational Games by Oweb Bishop, 1983, Printed in Great Britain
  • Motherboard: S/N 057894, assy No. 250425, Made in Hong Kong


Chips:

  • U1: CIA, MOS 6526, week 31, 1984
  • U2: CIA, MOS 6526, week 31, 1984
  • U3: BASIC ROM, MOS 901226-01, week 28, 1984
  • U4: Kernal ROM, MOS 901227-03, 1983 (no week)
  • U5: Character ROM, MOS 901225-01, week 33, 1984
  • U6: Color RAM, MM2114N, week 24, 1984
  • U7: CPU, MOS 6510, week 31, 1984
  • U17: PLA, MOS 906114-01, week 27, 1984
  • U18: SID, MOS 6581, week 28, 1984
  • U19, VIC2, MOS 6569R2, week 35, 1984. Defective replaced by TDB
  • U31, MOS 8701, week 34, 1984. Defective replaced by TDB
  • RAM, 8*NEC D4164-2


Sellers description:

Good Commodore 64 personal computer, tape player, 1 joystick, leads + power pack.
The power pack overheated at one stage but still worked – hence the tape around it.
I have not tested to see if the power pack will still work but I would say it was much safer to use an alternative power pack!
The Commodore has not recently been tested but was working when last used and has been well looked after so I do not see there would be any problems with it.
No original packaging.


Repair log:

  • Black screen of Death. No clock on MOS 8701. Replaced
  • Grey screen of Death (blue border). VIC2 defective. Replaced.
  • Glued datasette connector (broken plastic). Ground wire torn – hidden in connector (rarely used anyway).
  • Trashed PSU as it is non-repairable (covered in un-removable epoxy). Salvaged wire/connector for Commodore 64
  • Re-capped motherboard
  • Cleaned and lubricated datasette
  • Changed both drive belts in datasette


Work in progress:

  • Heatsinking larger MOS chips
  • Put week+year of new 8701 and VIC2 in here πŸ™‚
  • Overvoltage protection on motherboard (P6KE6.8CA)
  • Re-capping datasette
  • Build new PSU
  • Clean/test joystick


Costs (total DKK 1.000):

  • Breadbin, joystick, books and datasette: DKK 500.-
  • MOS 8701: DKK 100,-
  • VIC2: DKK 175,-
  • PSU (transformator): DKK 125,-
  • Misc.: DKK 100,-

Let me know if you will buy it for my costs when it is done πŸ™‚

“SQL Server does not exist or access denied” using Windows 10, build 1803

Microsoft SQL Server logo

If you are running your Microsoft Dynamics C5 or Microsoft Concorde XAL program files off a SMB1.x share, and your client is running Microsoft Windows 10, your C5/XAL might stop working if you upgrade your Windows 10 to build 1803.

This is really a “far out” bug, in build 1803 Microsoft apparently strengthened some security which makes it impossible to connect to a SQL Server through ODBC if – and only if – your program files are stored on a file sharing running SMB1.x (which means it will actually work if you copy your program files to a local drive – but that will off cause break things – some C5 and XAL files needs to be shared!).

And now we’re at it – this is not only hitting C5 and XAL, but other systems using ODBC as well: https://www.google.com/search?source=hp&ei=zfH6WqasBorGwQKImqroDw&q=sql+connection+problem+after+windows+update+1803&oq=sql+connection+problem+after+windows+update+1803

The solution is straight forward: make your file share run SMB2.0 or newer:

Hint: If you run this PowerShell command on your client, it will list all your network shares and the SMB-version in use for each of them:

Get-SmbConnection

Even Microsoft gets this wrong :-)

Microsoft Dynamics NAV logo

In Dynamics NAV events are also fired on temporary records – this is really a confusing design and can trigger various, hard to debug, but rather serious issues.

On one customer running NAV 2018 CU1, user group memberships was cleared randomly. We did’nt know exactly when, but in the end one of my Indian colleagues figured out it happened related to the “Export to a datafile” functionality.
I was pretty sure someone was doing a DELETEALL – but was it in our code or in the standard code? And exactly how/where?

Actually it was easily found.
I created a subscriber one the delete trigger in table 9001 / User Group Member – only with one line of code:

ERROR('STOP');

…and started the debugger.

Note that events are fired even if the table trigger is not executed (i.e. INSERT/DELETE/MODIFY/RENAME is called with FALSE).

The deletion of the group membership is caused by the select/deselect all companies on the “Export to a Datafile” page in NAV. The list of companies is build in a temporary company record and DELETEALL is used on it when you select or deselect the all companies flag.

Unfortunately there is a subscriber in Codeunit 2 called OnAfterCompanyDeleteRemoveReferences which does not check if it is actually called with a company beeing removed, or just called with a temporary record instance from somewhere.
So it cleans up anyway – removing actual reference data from still existing companies!

This shows very clear that non-self-explanatory functionality like events beeing called on temporary records should have been avoided by Microsoft when designing this.
After all the goal of the development environment and -language should be to help developers write correct code – not to trap them into creating bugs.

If I had to redesign this functionality I would make it an function trigger property (default off) if the subscriber should run on temporary record instances.
Or at least let a subscriber parameter tell if it is temporary or not (not that this would make it easier to check, but it would remind you about checking it every time you created a subscriber πŸ™‚ ).

To me the current functionality is wrong, people are getting bitten by this. It is illogical design and even if you tried it once or even multiple times (and my guess is that you have if you are writing event subscribers), you’ll probably forget it and do it again in the future.

At least we know we are not alone – Microsoft C\AL developers are actually also getting bitten by this :-).

Please note – this bug is not only emptying the 9001 / User Group Member table, but other tables as well: User Group Access Control, Application Area Setup, Custom Report Layout and Repor tLayout Selection.

By the way: The correct fix (introduced in NAV 2018 CU2) is to make these lines the first two lines in Codeunit 2, OnAfterCompanyDeleteRemoveReferences:

IF Rec.ISTEMPORARY THEN
  EXIT;
[…]

Sendmail/smart host with mysmtp.eu/smtp.dk

FreeBSD logo

Hi,

My internet service provider (ISP, Eniig) has announced that they will no longer provide a SMTP relay host (outgoing Simple Mail Transfer Protocol relay), and on top of that they earlier they stated that they will not setup reverse DNS on my fixed IP – so with these two (really bad) decisions in mind, I had to come up with a solution.

By the way – Eniigs reason for not providing SMTP relay servides anymore is that they apparently cannot manage to have such a server in production anymore because of SPAM anti measures etc. Really? An ISP not having the resources and knowledge to run a SMTP server in production anymore? Really!?!?!

Anyway – Eniig suggested usingΒ https://smtp.dk/ and even provides a free (almost unlimited) access until end of May 2018, so although there is a lot of cheaper alternatives out there – why not?
For non-Danish speakers wanting to join, smtp.dk also runs an international version of their service onΒ https://mysmtp.eu/.

Only problem is that it requires SMTP to the submit port (587) and authentication. And it is a requirement for me to continue to use my FreeBSD/Sendmail box, which is providing a lot of services – including some rarely used SMTP-services – for family and friends. This is actually a non-profit/free setup – so it is a pita that Eniig actually are putting extra costs into this, without reducing the cost for the Internet connection. Shame on them!!!

Actually, it was not that big of a hassle to configure Sendmail for this purpose – and I’m also doing SMTP authentication, SpamAssassin filtering, procmailΒ  and a lot of other stuff in my Sendmail :-).

This is what I had to do:

1.
Create /etc/mail/authinfo with one line (terminate it with a line break):

AuthInfo:smtp.dk "U:root" "I:<smtp.dk login name>" "P:<smtp.dk password>" "M:LOGIN PLAIN"

…replacing values in < > with you accounts values from smtp.dk
I feel most secure by making this file rw for root only

2.
Run makemap of this file to create a authinfo.db-file

makemap hash authinfo < authinfo

3.
Correct your sendmail.mc-file (whatever it is called on your system). Add these lines:

define(`SMART_HOST',`[smtp.dk]')dnl
define(`RELAY_MAILER_ARGS', `TCP $h 587')dnl
FEATURE(`authinfo',`hash /etc/mail/authinfo')dnl

Note: You should change this for the sendmail queue runner process, not a SMTP submit service etc.

4.
Compile your sendmail.mc file into a sendmail.cf file. This is easily done on FreeBSD πŸ™‚

make cf

5.
Restart sendmail. Again – this is easy on FreeBSD

make restart

Also: remember to correct your SPF and similar setups on your domains according to smtp.dk/mysmtp.eu.

A Commodore 64 Diagnostic Cartridge on Steroids

Commodore logo

Unfortunately I did’nt win Jan Betas Commodore 64 Cartridge give away, so I had to build my own. And why not take it to the next level:

  • Winbound W27C512-45Z EEPROMs
    10 pcs bought on www.e-bay.com from a Top-rated seller. They were bought as used, but working. They shipped in 3 tubes, 2*4 pcs and 1*2 pcs. Strangely enough the 2 pcs in the same tube were defective (the programmer software warned about wrong IDs and was not able to erase them – not even with the ID-check turned off). The price was low and I’ve had them for some time before I found out, so I did’nt complain to the seller
  • TL866CS Mini USB high-performance universal programmer with 5 socket adapters
    I know I could have programmed my EEPROMs with a PC parallel port or an DIYArduino programmer, but I needed a programmer for other projects anyway
    Bought from www.satkit.com
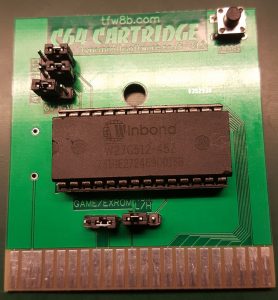
  • C64 ROM Cartridge
    In future projects I’m planning to try to order prototype print online, but I did’nt have the PCB layout and currently have no experience in ordering PCBs online. So i choose to buy something working and even got a plastic case.
    Bought from www.TheFutureWas8bit.com

Then the task was simply to figure out how the Cartridge PCB works.

The PCB is delivered with a plastic case, but I don’t use it. I need to have full access to the jumpers and EEPROM so I can re-program it.

WARNING: All the jumpers have default traces on the PCB you need to break before installing pin headers for jumpers. If you don’t need jumpers, you should leave the traces alone so the pins are not floating :-).

Then I made a plan for which ROMs I wanted to put on the EEPROM and at which address in the EEPROM. You could install one ROM per EEPROM, but since all the diagnostic ROMs i found were 8KB and the EEPROM was 64KB it would waste a lot of EEPROM space.

Luckily the A13, A14 and A15 jumpers on the ROM cartridge actually makes it possible to choose 8 different “banks” of 8KB out of the 64KB EEPROM. So in fact the 3 jumpers will choose between up to 8 ROMS of 8KB each.

In the following table “L” or “R” tells if the jumper should be installed in the Left or Right position. Note that hex 2000 is actually 8KB (8.192 bytes).

EEPROM
addr.
A13-A15 Game/
ExROM
ROM
L/H
Dead Test 781220 0x00000 LLL L R
Diagnostic 586220 0x02000 RLL R L
Diagnostic 4.1.0 0x04000 LRL R L
Diagnostic 324517 0x06000 RRL R L
Doktor 64 0x08000 LLR R L
(Empty) 0x0A000 RLR n/a n/a
(Empty) 0x0C000 LRR n/a n/a
1541 Diagnostic 0x0E000 RRR R L

I’ve also filled in the Game/ExROM and ROM Low/High configuration as the Dead Test ROM is special: it runs in Ultimax mode at 0xE000 (ROM high), while the other ROMs I use runs in Game mode at 0x8000 (ROM low).
Note that the Game/ExROM jumper probably should have been named ExROM/Game as ExROM/Ultimax is active when it is set in the left position.

Commodore 64 Cartridge

Thanks to WorldOfJani for providing the ROMs for download on the blog. Note that you need to burn the .bin file as the .crt file is for Commodore 64 emulators.

Hint: When you load the individual ROMs in MiniPro (the software included with the programmer), it is possible to disabling clearing the programming buffer before loading and also setting the loading address according to the table above.

After burning the ROM, I found that the Diagnostic 324517 did’nt work – the Commodore 64 just started as if no cartridge was inserted. Af re-burning the EEPROM a few times, I realized that the .bin file is corrupt and converted the .crt file to a .bin fil using CARTCONV.EXE from the VICE Commodore 64 emulator. That worked. I’ve added a comment on the WorldOfJani blog about that.

On my to-do list is to create the two different test harness required by four of the ROMs.